My Final Gameboy Build
Back in September I was gearing up to put together a GBA build for a friend and found a package deal of 2 cosmetically flawed GBAs on Ebay. The price was right and I could use the other to build my dream GBA. Both devices had missing battery covers, scratched up screen lenses and 20 years worth of dirt caked in every crack aka the perfect candidates for makeovers.
The first device didn’t have any issues outside of looking dirty so it was perfect for my friend but the second one had bad shoulder buttons which are a pain to replace. Third party replacement shoulder buttons are terrible so my enthusiasm to make my dream build plummeted. In addition to bad shoulder buttons, the screen’s ribbon cable connector was broken on one side. The connector still worked but I was sceptical if it could keep the ribbon cable snug over time. All this to say I was not confident in this motherboard so I shelved my build.
Fast forward to December I see a sale for a GBA Consolizer from Intec Gaming. A consolizer is a fancy word for converting a handheld to a shelf device. “This is the perfect device for my spare motherboard” I thought.
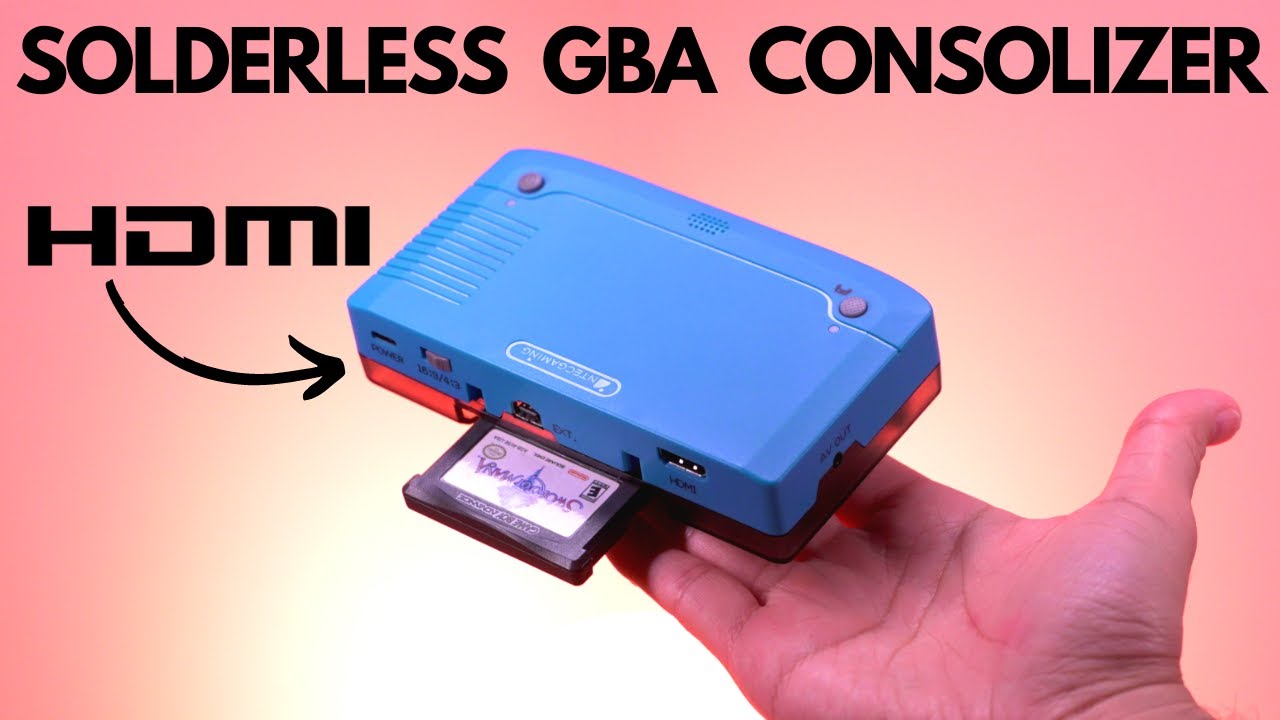
Unfortunately the consolizer came defective. It would not output video through HDMI but did through the AV cables. Not ideal in my opinion so I returned it. What I regret the most about installing the mod was it required the GBA to have the power switch always in the ON position because the secondary board controlled the power. Thinking I was being smart I took apart the power switch and soldered a wire forcing it to always be ON aka I irreversibly broke the switch. What have I done.
Several months go by and I finally decide to do something about that darn motherboard. I bought a replacement power switch, shoulder buttons, new capacitors and a new speaker. Unfortunately I was struck yet again with bad luck and I ripped some crucial contacts while removing the old power switch. Luckily I ran a new wire to reconnect the broken trace and everything worked again. I did a test fit with all the new parts and gosh darn it was awful. The shoulder buttons did not always register presses and required sanding to make them fit in the shell and the power switch flickered ON and OFF. The flickering never happened during testing outside the shell but for some reason only when flicked by the power button. My dream build is over because there’s no salvaging this thing.
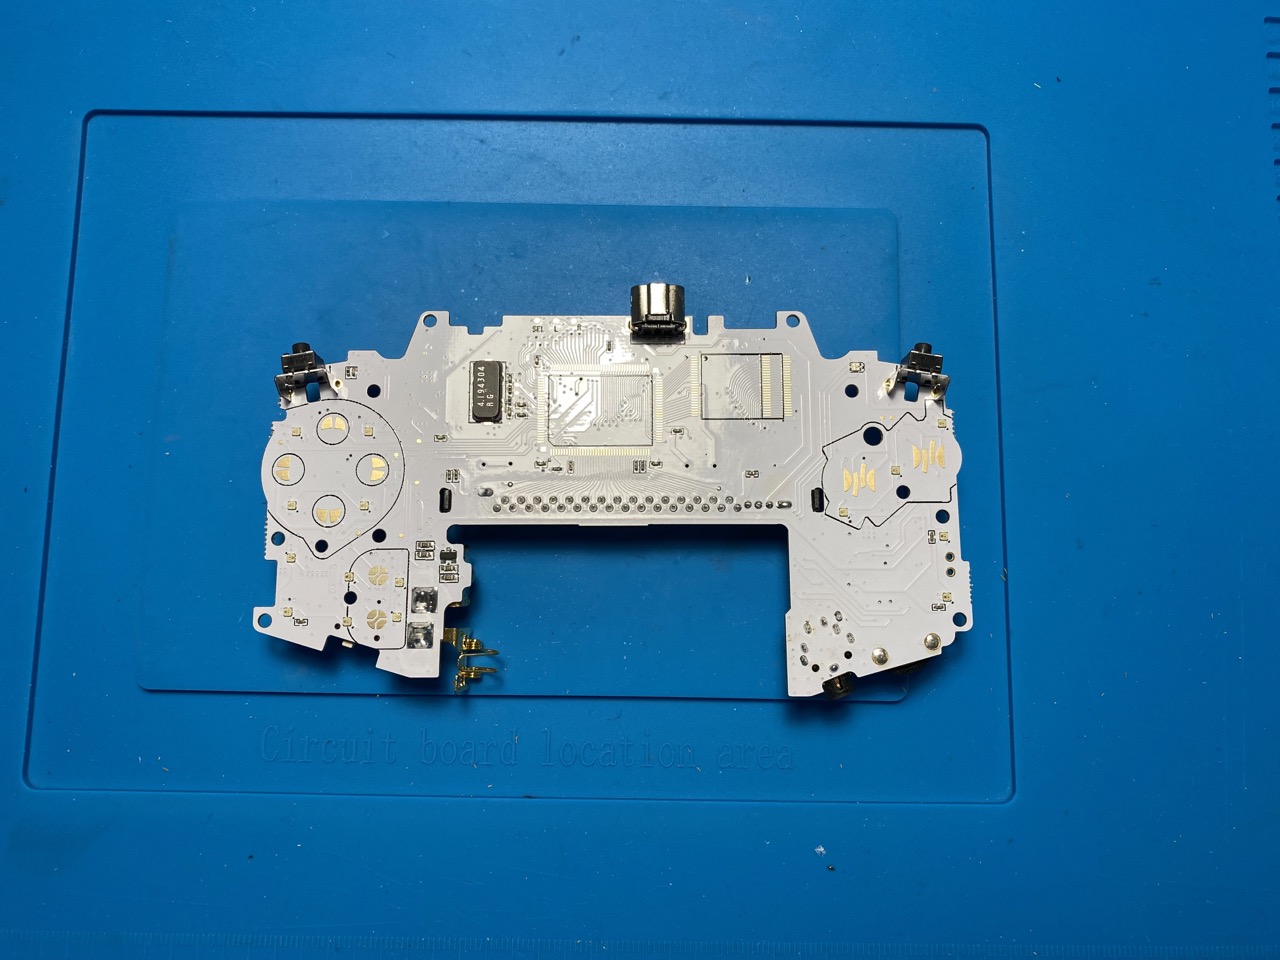
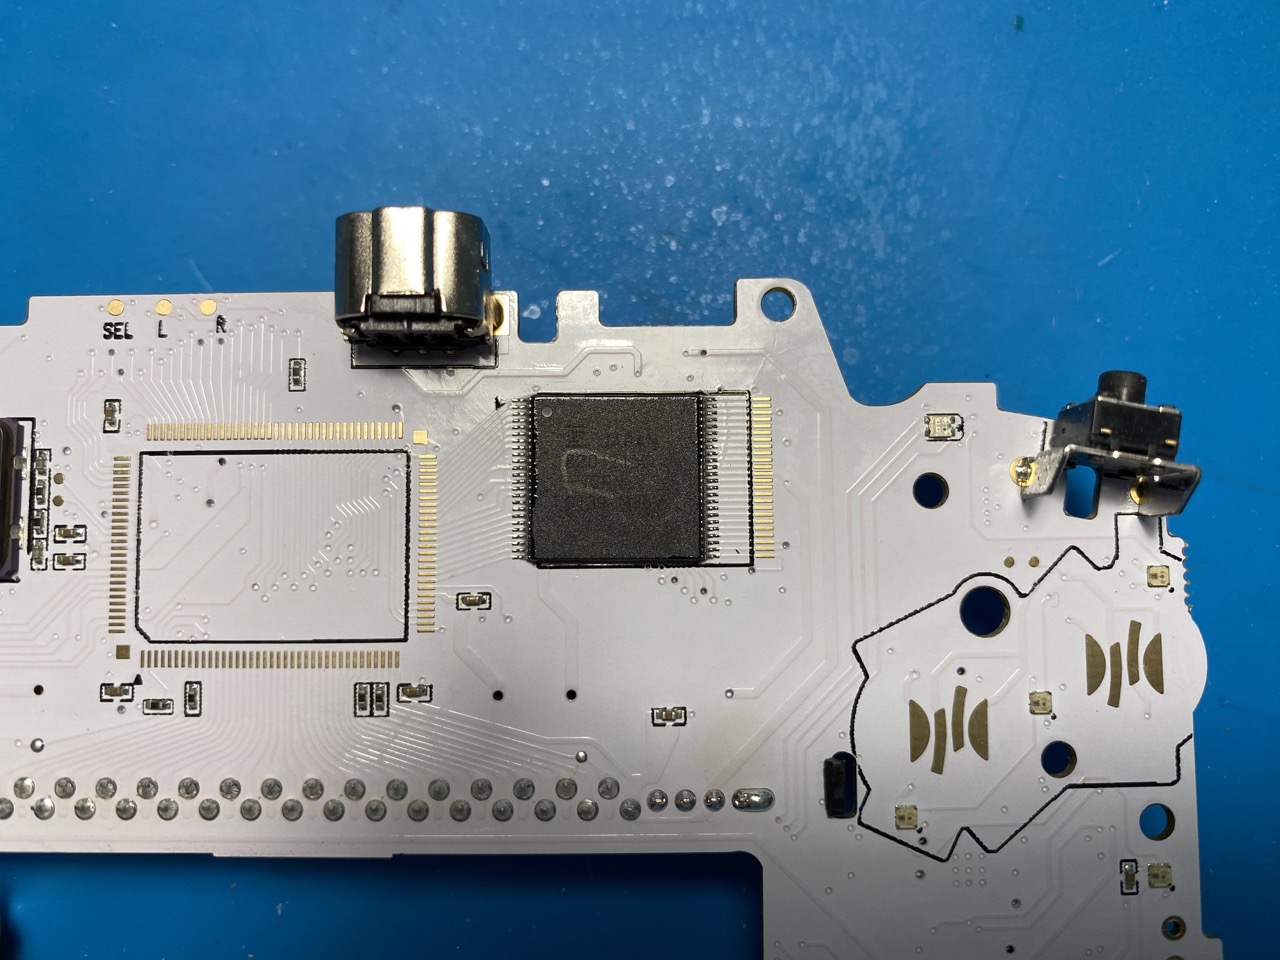
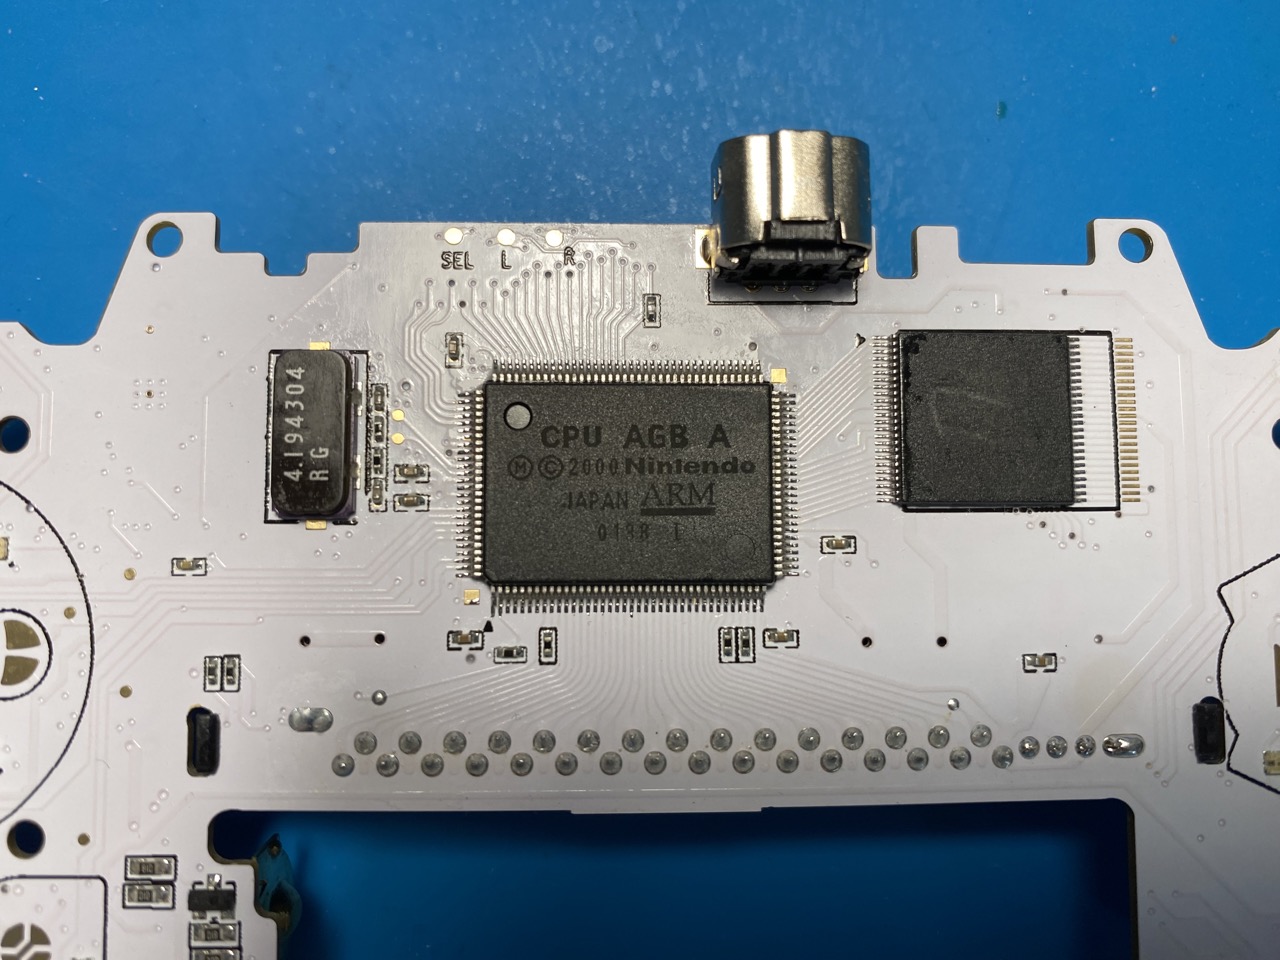
Time went by and Funny Playing came out with their own replacement motherboard and caught my attention. The mod requires you to transplant the CPU and RAM chips from an existing device, which I conveniently had, onto the new and improved board. It sounded way too hard so I almost immediately shelved that idea… until now. Queue the montage music.
I picked up some Chip Quik, watched a few Youtube tutorials and got to popping off some chips.
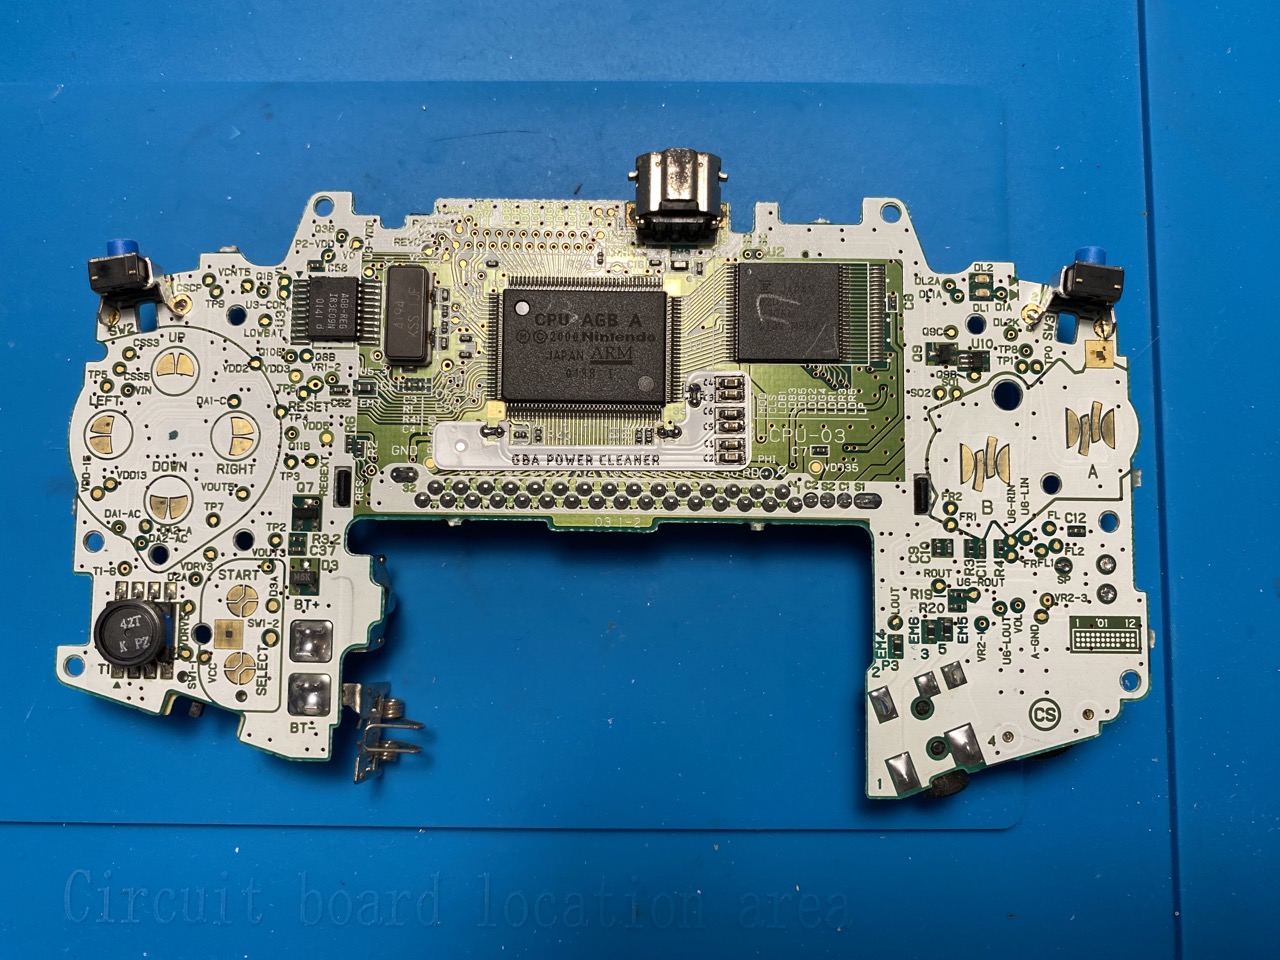
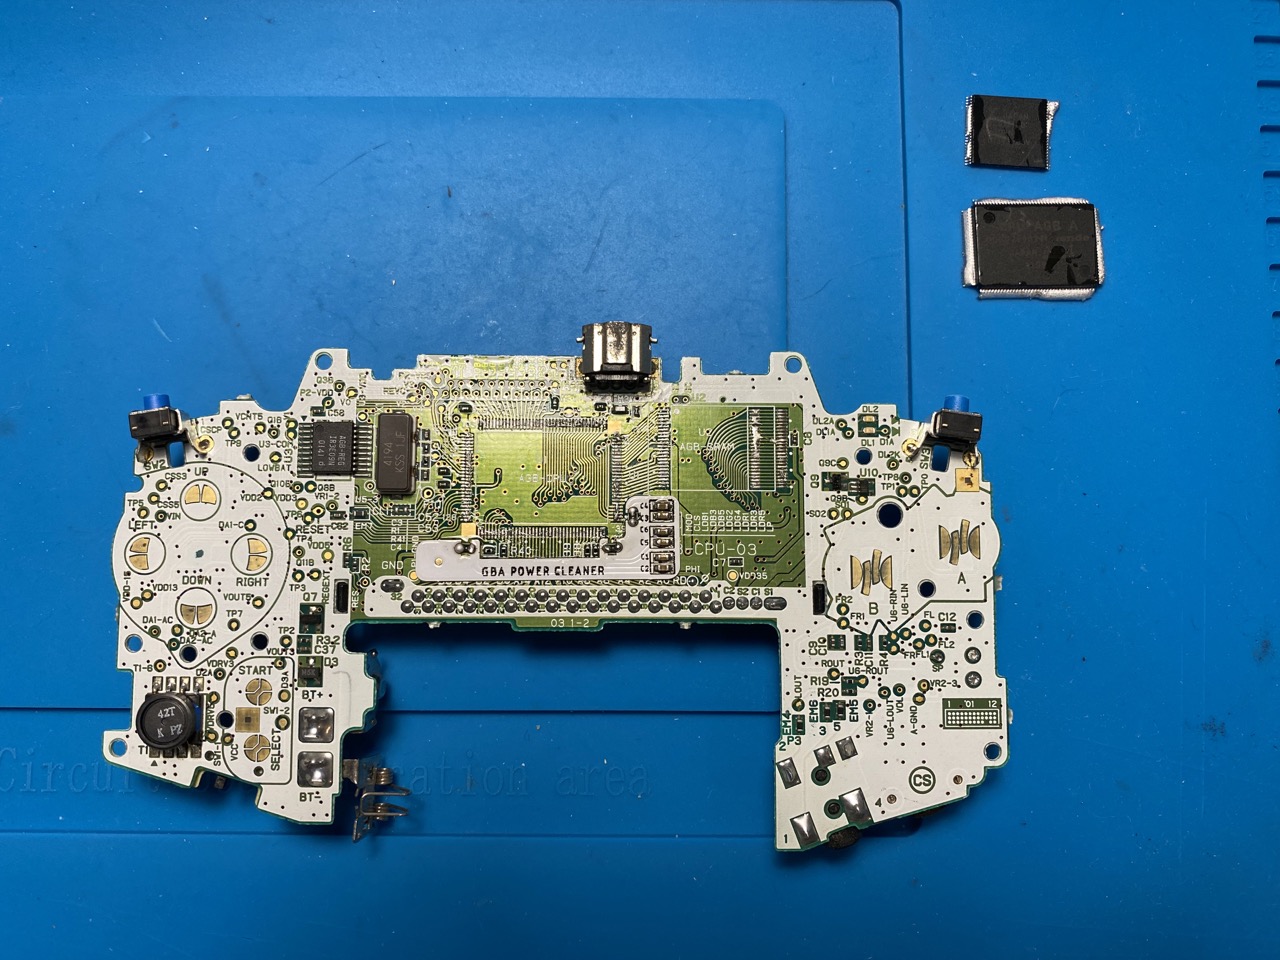
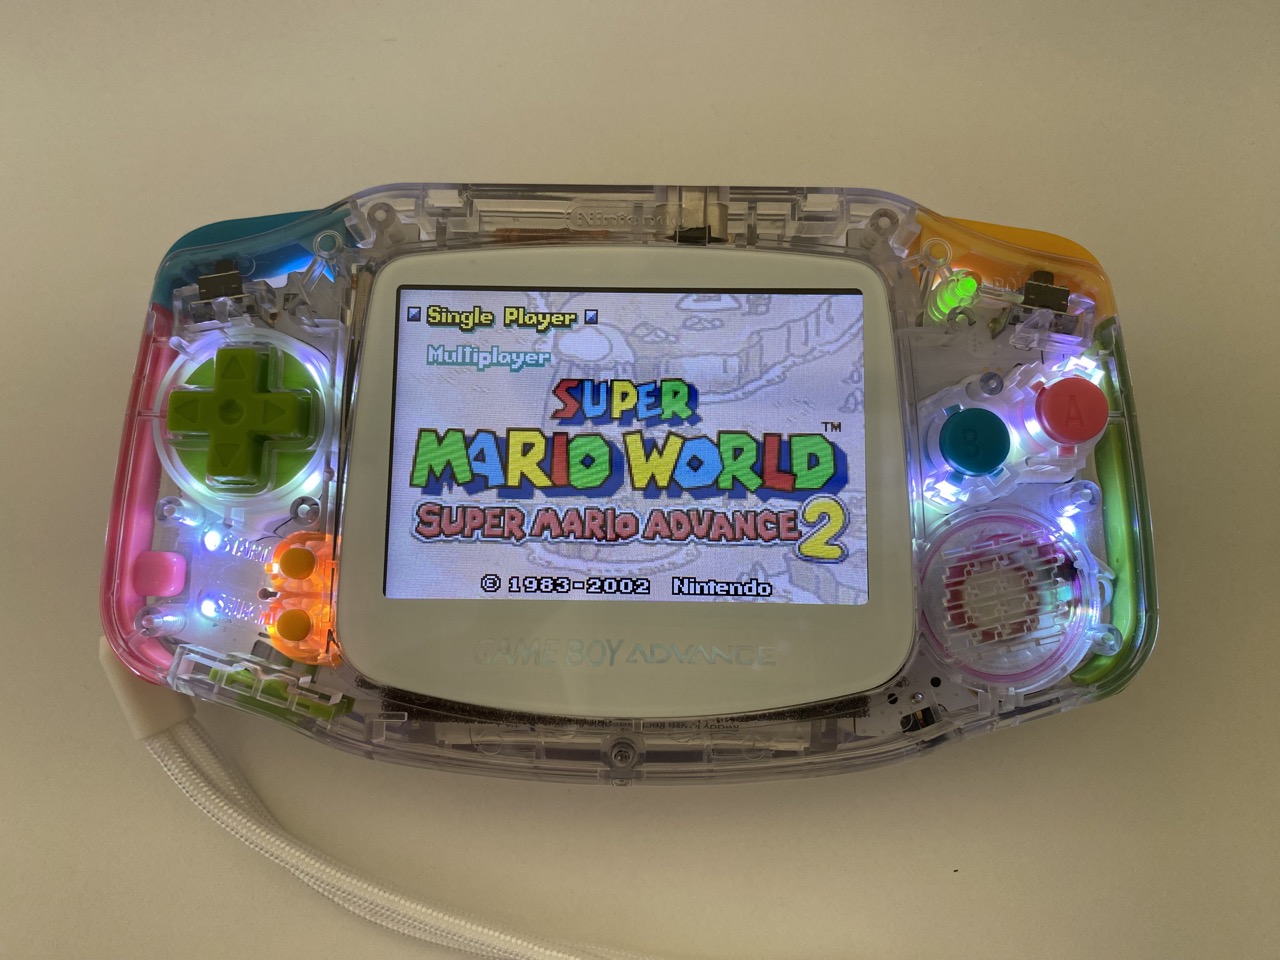
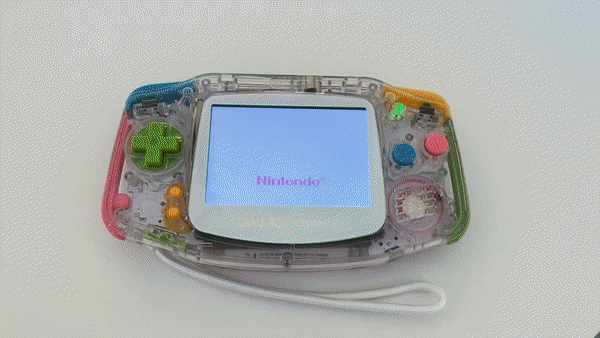
The new motherboard has a ton of improvements plus some fancy customizable LEDs.

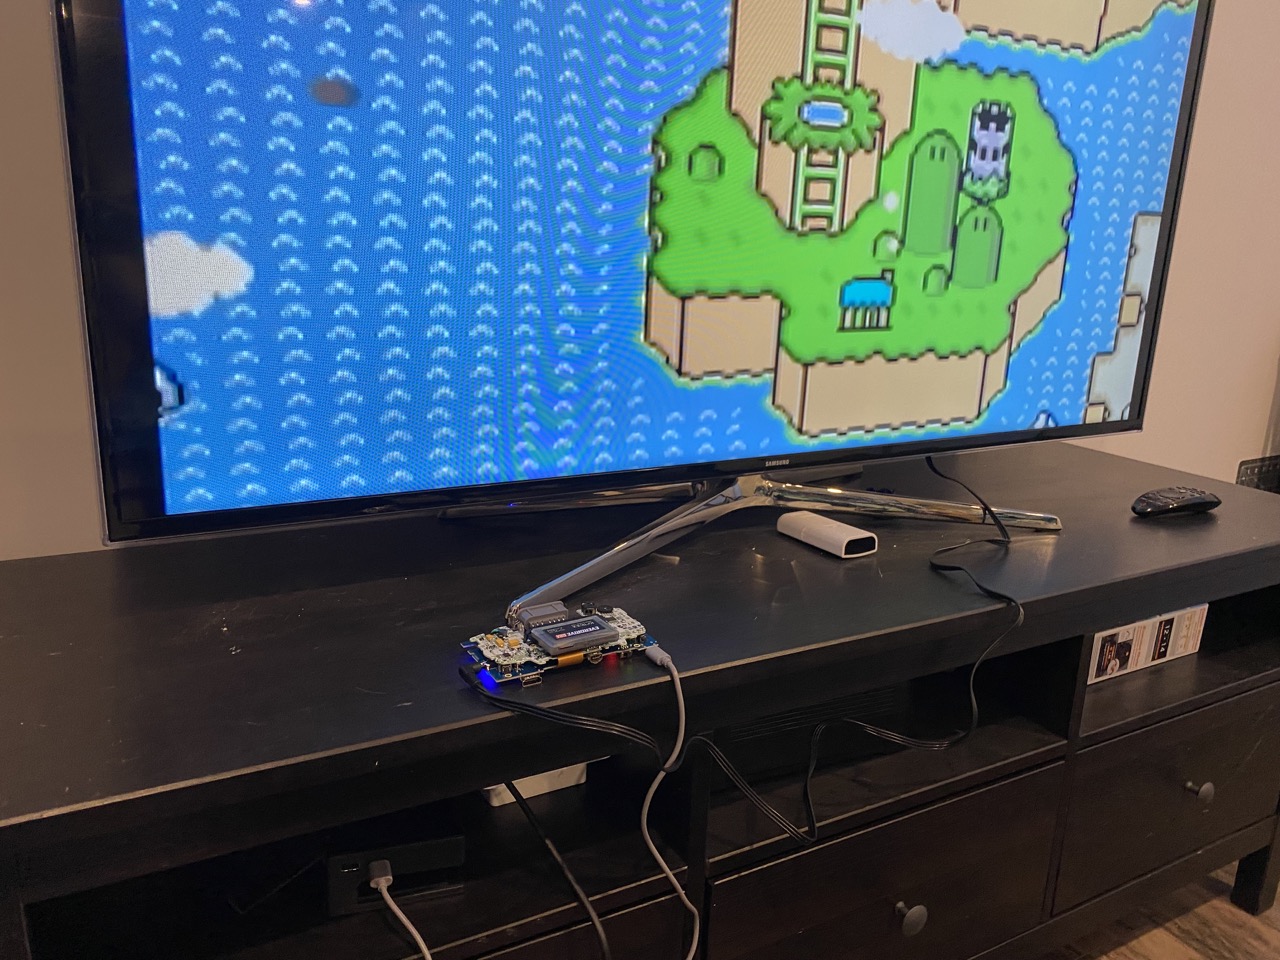
It turned on first try!!!
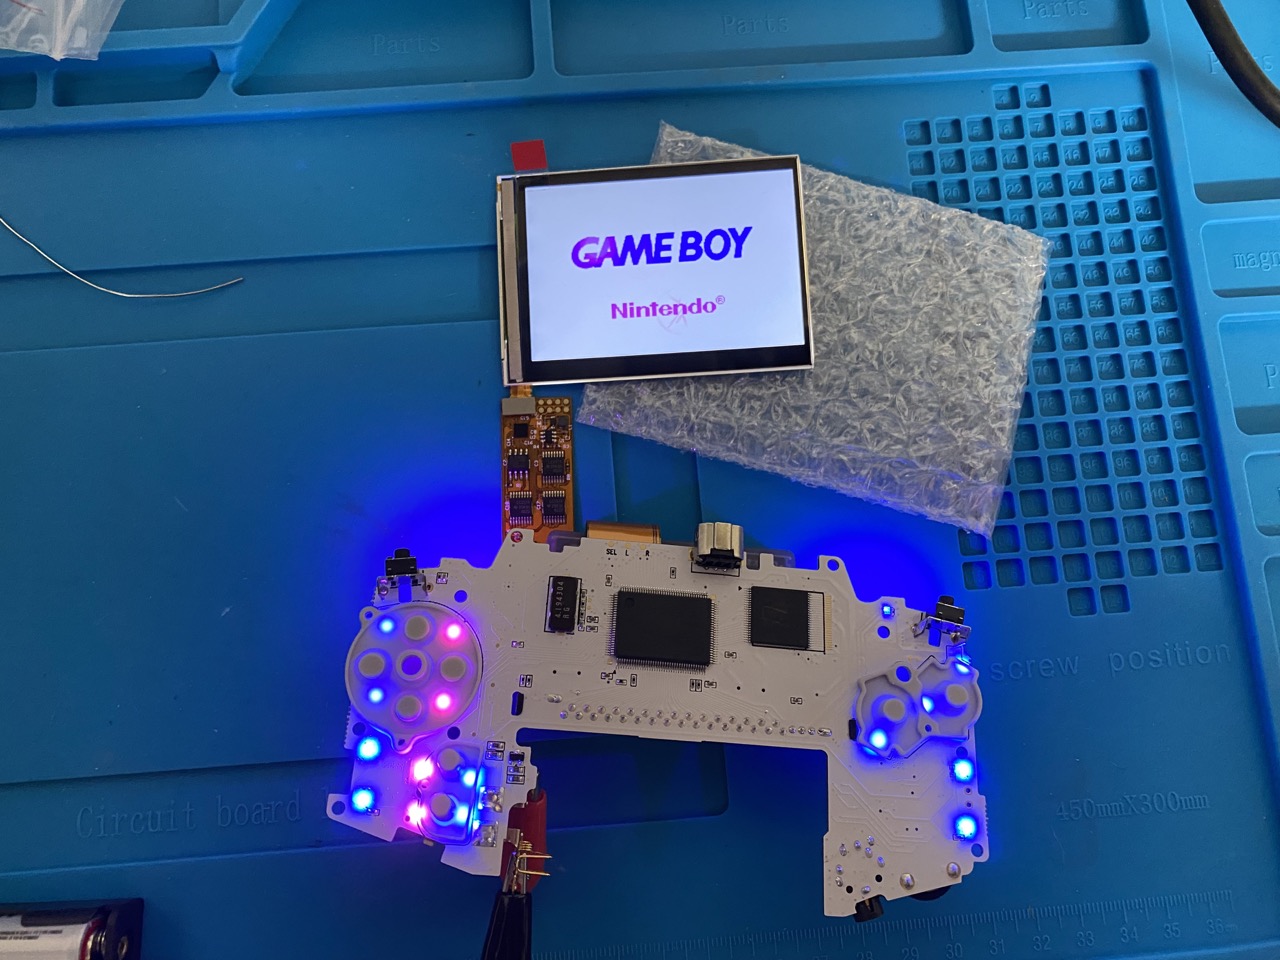
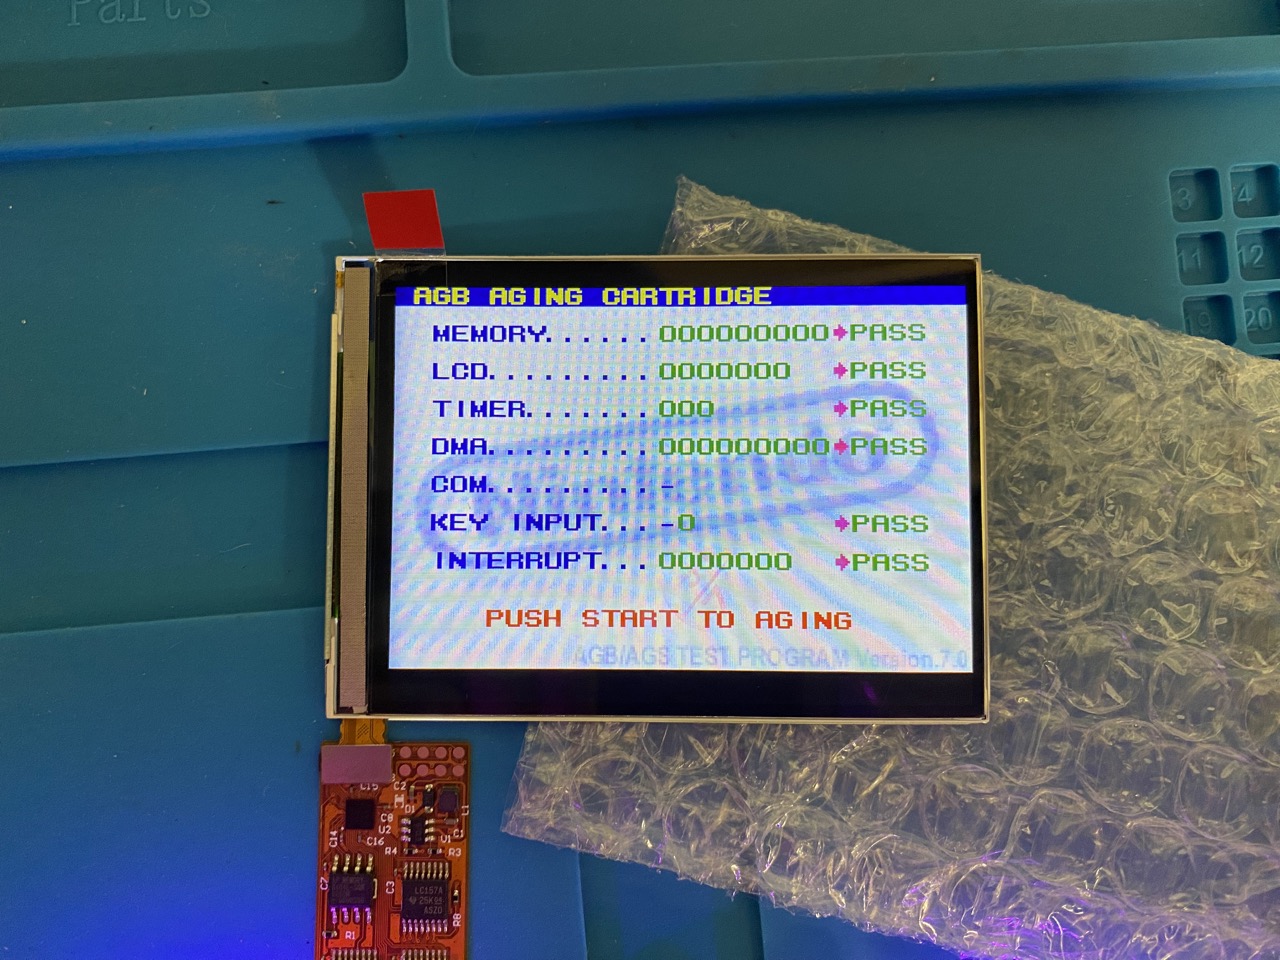
I ran the AGB Aging test cartridge and everything passed! I was immensely happy nothing went wrong this time around. Everything worked first try and this was hands down the hardest solder job I’ve done to date.
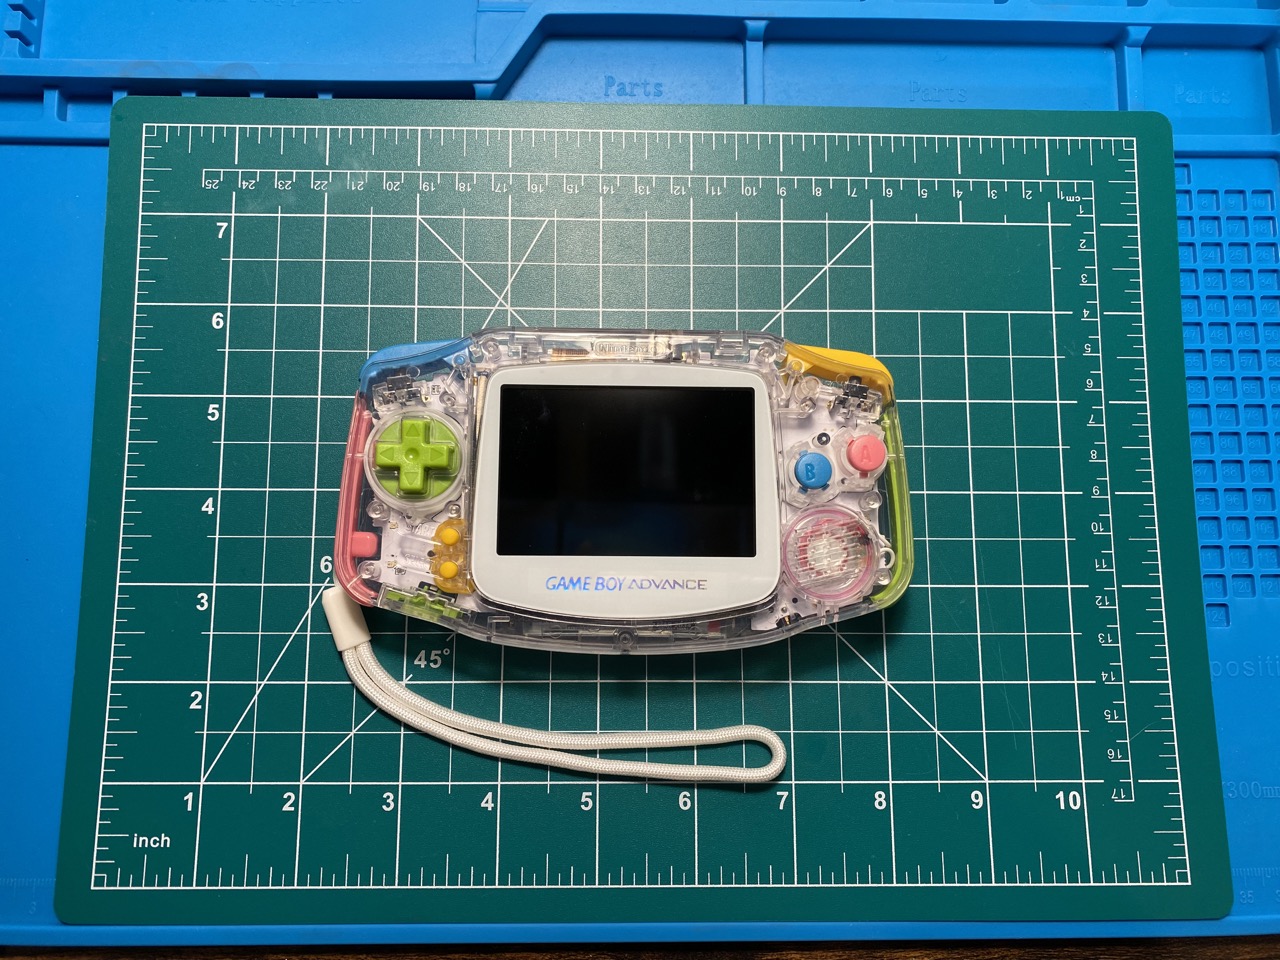
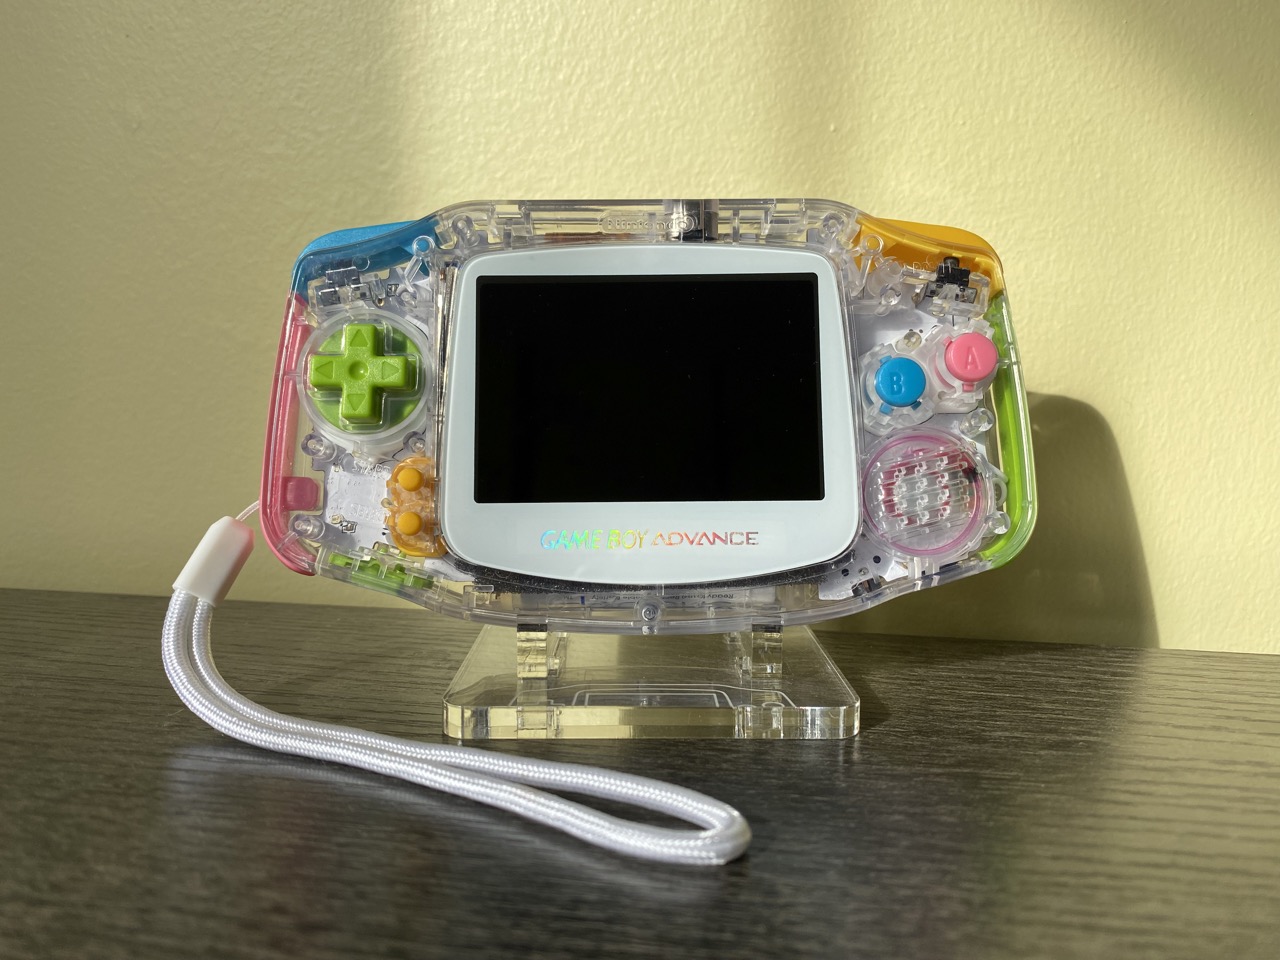
The grand reveal! It literally took me an hour to choose the colour layout.
This is my last Gameboy Advance mod. I have a couple SPs lost in the mail that I plan to fix if they arrive but I’ll be keeping them stock.